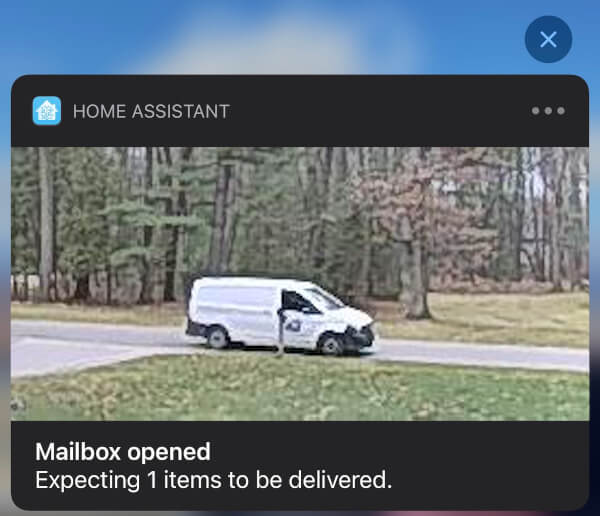
Have you ever waited endlessly for an important package or mail to be delivered? Have you ever dealt with a package being stolen from your mailbox? In this guide I’ll show you how to see packages will arrive today and notifications when it’s delivered as shown below with the help of Home Assistant!
This guide will also show you how to bring in mail and packages sensors from various different delivery services to allow you to see your mail in the Media Browser as well as provide additional context to the delivery notifications.
A huge shout out to Ryan Hoffman who shared his experiences with the Ring mailbox sensor and how he was using the Camera Proxy Integration.
Configuring Integrations
In the sections below we will configure some integrations and email settings.
Installing Home Assistant Community Store (HACS)
If you haven’t done so yet, please follow these instructions to install HACS. This will allow us to install and manage third party integrations, plugins, themes and more.
Installing the Media Source integration
Installing the Media Source integration will allow us to view what email is arriving today as well as any image snapshots we take when our mailbox is opened!
Installing Mail and Packages integration
Once HACS is installed, we need to install the
Mail and Packages Integration.
This integration uses IMAP to search your email account for specific emails by
different delivery services like Amazon, USPS, FedEx, UPS, DHL and
more.
There is a complete guide located on the projects site on how to install and configure the integration.
I really like receiving the daily USPS Informed Delivery email notifications with the images of mail being delivered so I can see if I even need to get the mail for today or I can wait until I get a package I care about. It’s also helped me inquire when I didn’t get a piece of mail it said was coming. Having this all in Home Assistant as an animated gif with sensors has taken it to a whole new level.
I recommend configuring the sensor list to track only what you are interested.
This will ensure the sensors update quickly only searching your email for the
delivery services you are most likely to use. This will create a bunch of
sensors for each delivery service (e.g., sensor.mail_usps_mail,
sensor.mail_amazon_packages).
Important: I search the all mail folder and archive all delivery email notifications. If you delete the notification emails, the sensors will not detect the arriving / delivered mail properly.
Finally, make sure you specify the image path to use the new media
integration! You can do this by setting the Image Path to /media/mail.
This will create a gif attachment /media/mail/mail_today.gif of all the mail
being delivered to you that you can can view via the media browser or in a
notification!
Here is what my configuration looked like:

Camera Integration
I recommend having a camera pointing where packages are normally dropped off (e.g., front porch) and mailbox if possible. This allows you to take a snapshot when a package is delivered and use these in notifications.
A smart doorbell with a video feed has been working great for my setup. I use the Ubiquiti UniFi Protect G4 Doorbell as it stores all the data locally. But you can use the Nest Hello or Ring Video Doorbell. Just be careful about your privacy settings and be aware of the cloud dependency.
Depending on your camera you choose, you’ll need to configure it in Home Assistant.
Camera Proxy Integration
The Camera Proxy integration is a little known integration but worth it’s weight in gold. This integration lets us crop a camera into only the area we are interested in, thus removing a ton of noise from an image. You make a camera containing only the area you are interested. Below we turn the original camera content

into

In order to setup the image cropping your first need to know the offsets in
your existing image that you wish to crop. I’d start by saving an image snapshot
from your camera feed and loading it into an image editing software like
GIMP that supports showing you the X,Y coordinates
of where you clicked.
Next, click on the upper left of where I wanted to start the crop. GIMP showed
me the X1,Y1 of 750,580 when in the lower left toolbar. I then set image_top
to 580 and image_left to 750.
Next, click on the lower left side where I wanted to end the crop. I got the
X2,Y2 of 1015,705 when in the lower left toolbar. I then did some basic
subtraction and set max_image_width and max_stream_width to the value of
X2-X1 and set max_image_height and max_stream_height to the value of
Y2-Y1
Here is the yaml configuration that I used for my camera:
- platform: proxy
  entity_id: camera.front_door
  name: Mailbox
  mode: crop
  max_image_width: 265
  max_image_height: 125
  max_stream_width: 265
  max_stream_height: 125
  image_top: 580
  image_left: 750
You can now reference this Camera Proxy integration as a normal camera named
camera.mailbox!
Mailbox Sensor
If you already have a mailbox sensor you can skip this step.
I’ve researched a lot of different solutions both DYI and paid products for getting notifications when my mailbox was opened. Here was some of the things I was looking for in a sensor:
- Will it last the brutally cold winters and thousands of open and closes?
- Will it work in a metal faraday cage (e.g., metal mailbox)?
- What is the battery life?
- What is the max range the sensor data will transmit
- Can I get the sensor data locally?
- Will the company be around in five years?
Ring Mailbox Sensor
I ended up going with Ring Mailbox Sensor. I was really hesitant at first given Ring cloud dependency and track record around camera privacy. I’ll cover this more in detail in a review later.
However, It was the only solution that worked with my metal mailbox due to the antenna and checked off most of the criteria.
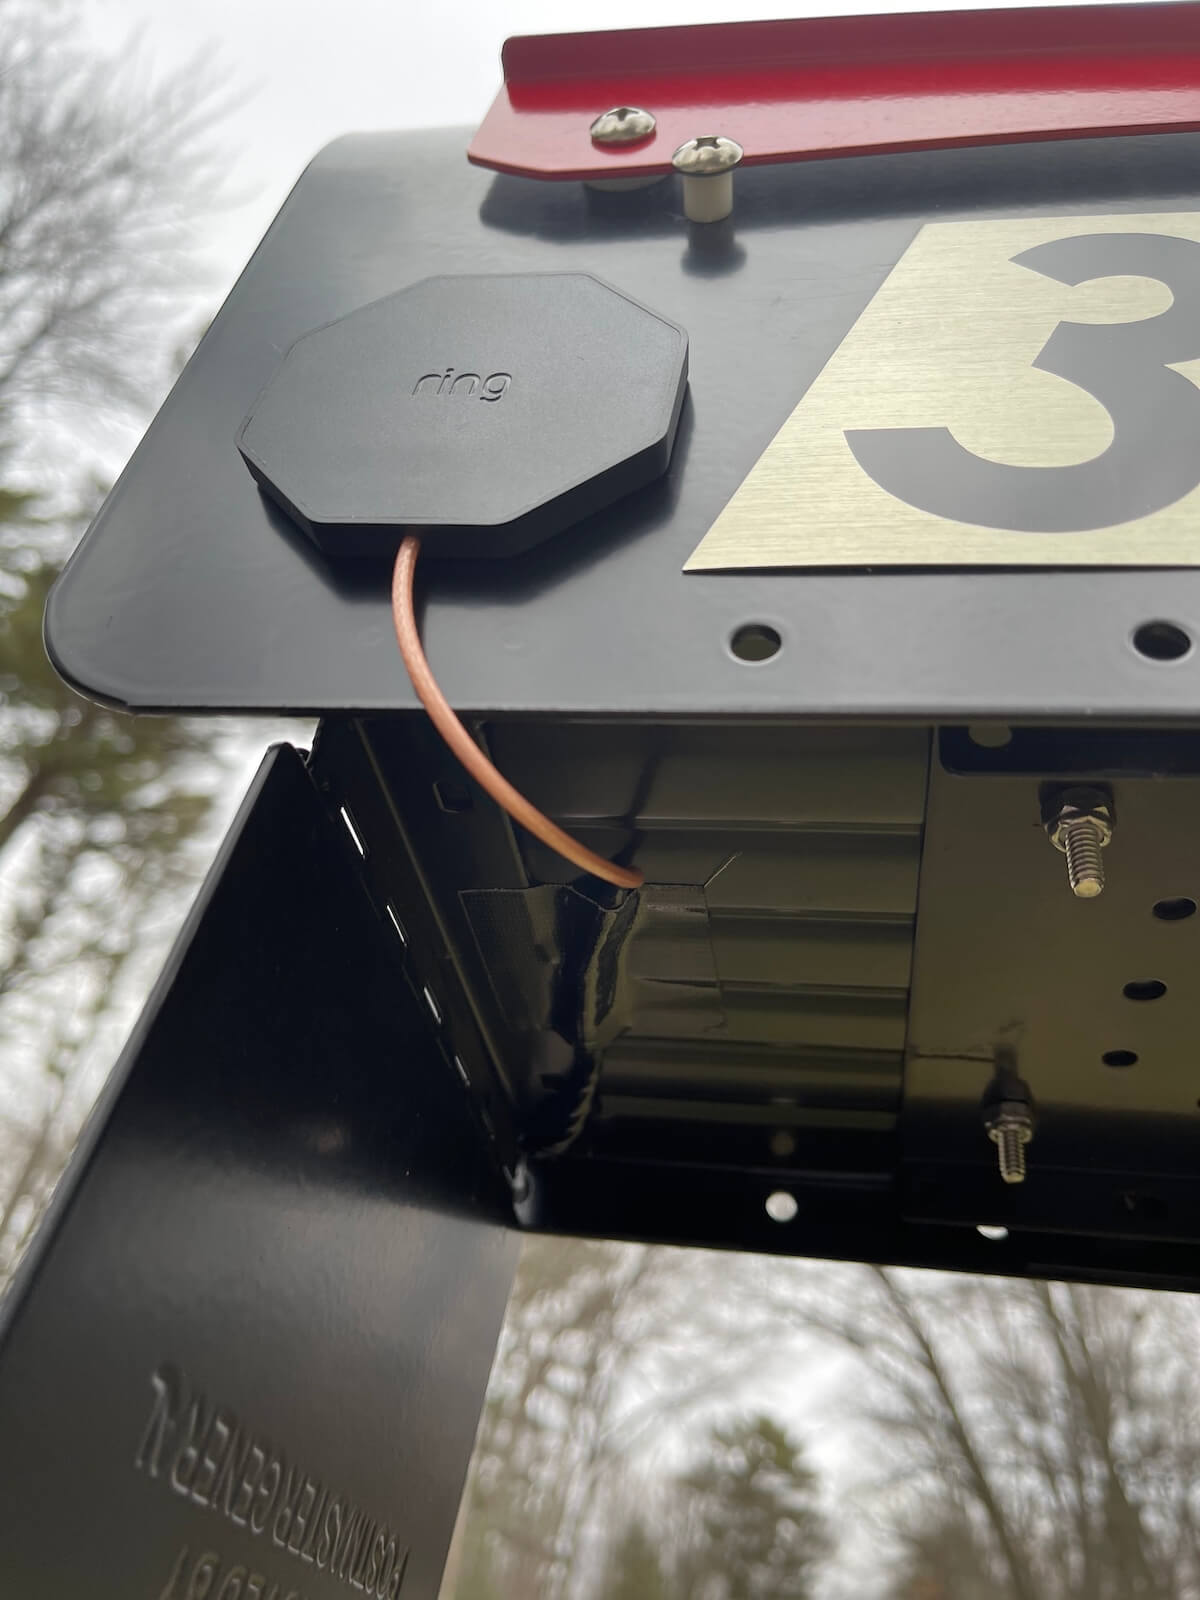
The cable was also braided which gives me confidence it will last over time. I also wrapped the cable with some extra tape and taped it to the bottom of the mailbox and to the door.

I followed the Ring installation documentation and setup the light bridge as well.
Ring Integration
This integration assumes you are already using MQTT. I’d recommend using the official Mosquitto add-on.
Lets install the Ring Devices via MQTT Add-on from Home Assistant Community Add-ons repository. This allows us to run Ring discovery locally and have our devices integrate automatically with Home Assistant by taking advantage of all the awesome community work that’s been done. Behind the scenes the add-on uses auto discovery to expose configured devices to Home Assistant automatically!
We have to install this addon because the official Ring integration doesn’t support the Ring light bridge that the mailbox sensor uses.
- Navigate to http://homeassistant.local:8123/hassio/store.
- Click on the option menu in the upper right and select
Repositories. - Enter
https://github.com/tsightler/ring-mqtt-ha-addonand then click theAddbutton. - Click the close button to close the
Manage add-on repositoriesdialog. - Select the
Ring Devicesadd-on or access via the url http://homeassistant.local:8123/hassio/addon/03cabcc9_ring_mqtt/info. - Click the
Installbutton. - Click the
Startbutton. - Finally, open the Web UI once the addon is started and login to your Ring Account.
The Ring devices should now be discovered and shown under the MQTT Integration.
I had two devices created for me and a mailbox sensor
binary_sensor.mailbox_motion.
Automations
The possibilities are endless for what you can do when the mailbox is opened.
I’d recommend checking out Home Assistant Blueprints for quickly importing and consuming automations.
Send picture notification when mailbox is opened
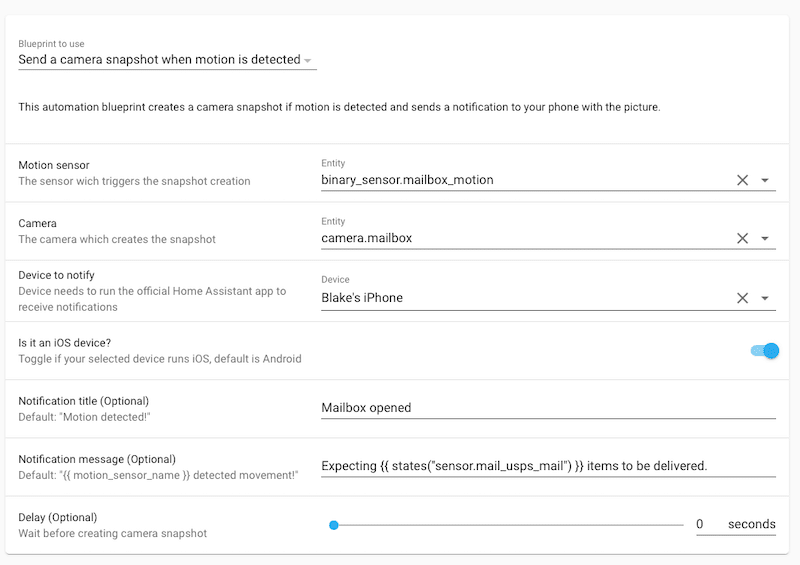
I’m using the following Home Assistant Blueprint
to send a notification when the binary_sensor.mailbox_motion is triggered
using the camera.mailbox for the camera source.
I customized the Title to Mailbox opened and used a template for
the Message of Expecting {{ states("sensor.mail_usps_mail") }} items to be delivered.
This uses one of the sensors that our Mail and Package integration
added.
Store a media snapshot when mailbox is opened.
I’m using the following Home Assistant Blueprint
to take a camera snapshots and save them to /media/mail for easy viewing.
I set the File Path to /media/mail/last_opened.jpg and the
Archive File Path to
/media/mail/archive/opened_{{ now().strftime("%Y%m%d-%H%M%S") }}.jpg

Automation ideas
The possibilities are endless for what notifications you could do when the mailbox is opened like:
- Play a Text-to-Speech (TTS) notification for
You Got Mailto anymedia_player. - Stream the
camera.mailboxfeed to amedia_player. - Turn on the outside lights if the mailbox is opened at night.
- Send notifications when mail is scheduled to be delivered.
- Trigger object recognition to see who is at your mailbox.
Lovelace integration
You can also use a picture card to display the last snapshot of who opened the
mailbox /media/mail/last_opened.jpg as well as one for all the mail out for
delivery today with the /media/mail/mail_today.gif source. I’ve opened a
feature request
to make this much easier!
Conclusion
I hope this article helps you be better informed about mail deliveries and what packages to expect are coming. It’s helped give me more confidence and saved myself countless empty trips to the mailbox.
Twitter
Facebook
Reddit
LinkedIn
Email